For easier navigation of this TablePress guide, refer to the TablePress Index for all of the topics covered.
This content type is used to create new tables. This content type must be used instead of copying and pasting HTML tables into a page (e.g. copy/pasting a table from a Word document). Tables can be placed on any page, and are a good way to organize information. Tables are commonly used for organizing contact lists, schedules, links to other pages or sites, and files.
Inserting a Table into a Page
1.) When editing a Page click the “Insert a Table from TablePress” button.
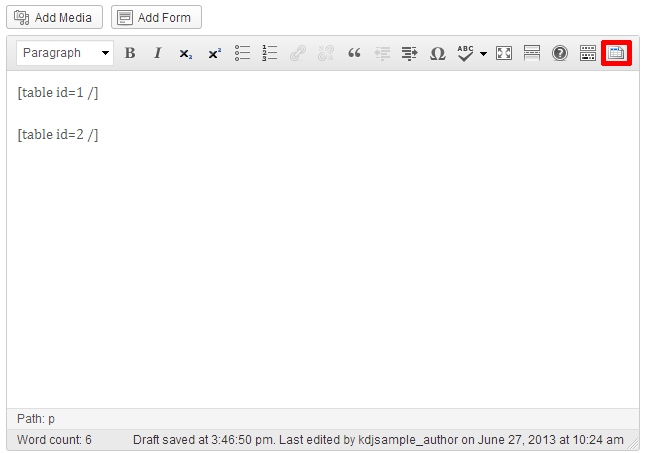
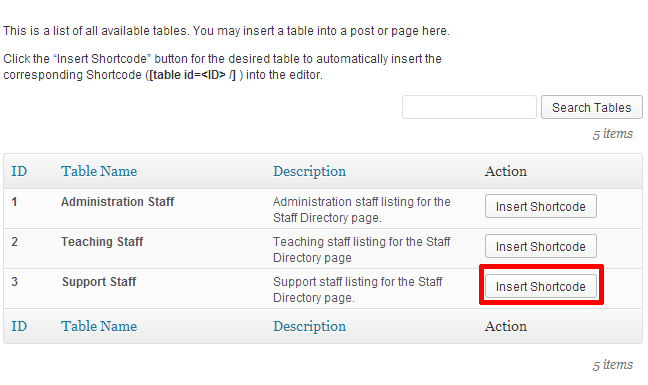
2.) Click the “Insert Shortcode” button beside the desired table.
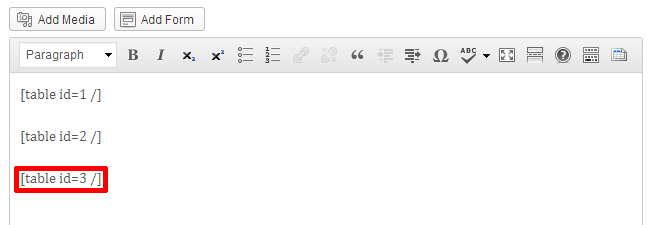
3.) The short code for the table is now added to the page, and the table will be displayed to users visiting the site.
Return to the TablePress Index
Create a New Table
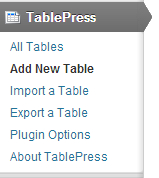
1.) From the dashboard, choose ‘Add New Table’ from the ‘TablePress’ menu item in the left sidebar.
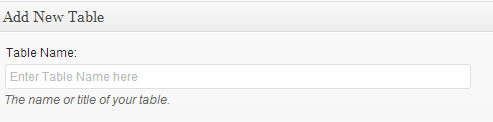
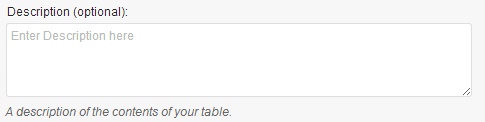
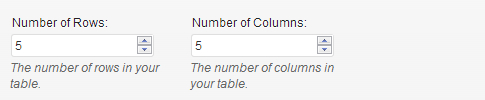
2.) Fill out the following content areas:
- Table Name — This is the title that can automatically appear above your table on a page, as well as identify your tables when editing them. It is important the name is unique, descriptive, and relevant to the content of the table.
- Description (optional) — The table description is used to further distinguish your tables. Like the title your description can automatically be added to any page your table appears.
- Rows & Columns — Set the number of rows and columns required for your table. If you are unsure or make a mistake you can easily add or remove rows & columns after creating the table.
3.) Once you are satisfied with the title, description, number of rows and columns create your table by clicking the add table button.
Return to the TablePress Index
Populating and Editing a Table
After clicking the ‘Add Table’ button or clicking on an existing table for editing you will be presented with the following options to customize and populate your table.
Return to the TablePress Index
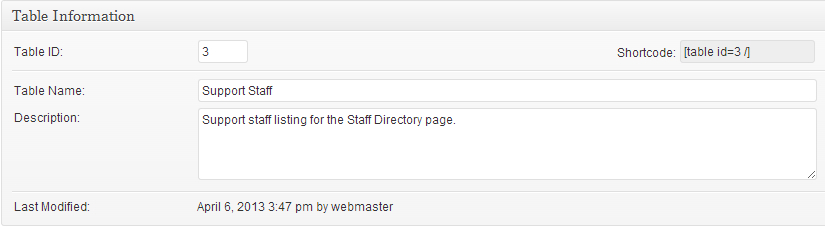
Table Information
Table Information allows you to view and edit the Table ID, Table Name, and Description. Though it will allow you to change the Table ID, it is strongly discouraged. Changing the table ID could cause conflicts with other tables and prevent it from displaying on your pages.
Return to the TablePress Index
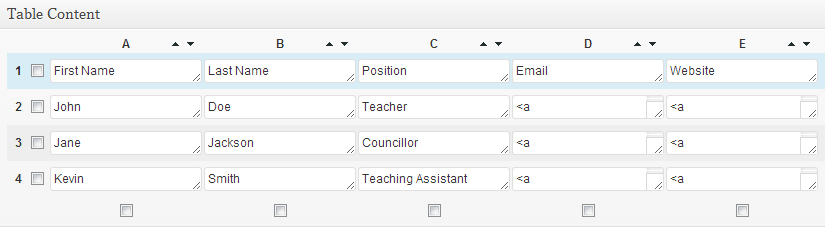
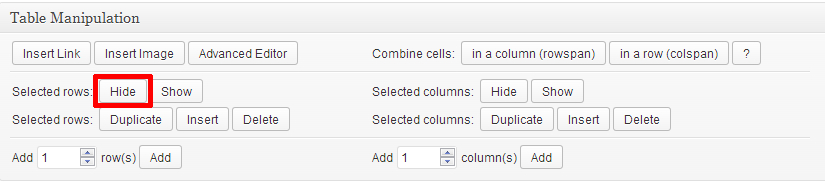
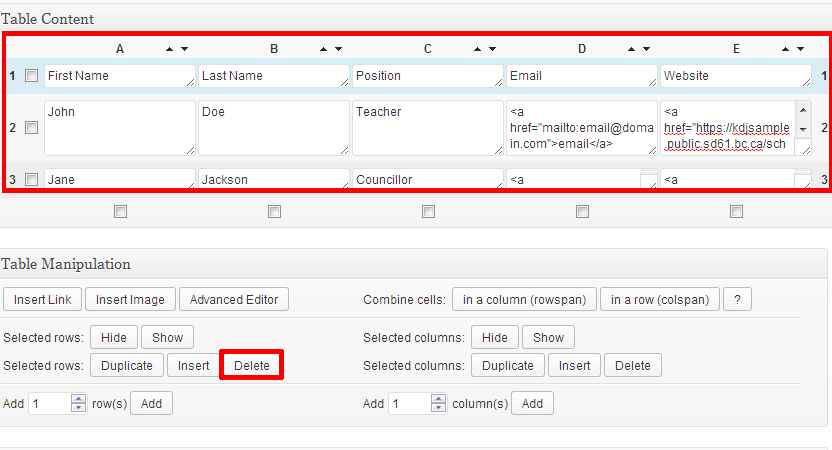
Table Content and Table Manipulation
This is where you edit the content of your table, such as text, links, and images — as well as adding and removing columns and rows.
Notice that row 1 is highlighted blue, this indicates it is set as the table header. As the table header it will be formatted differently than the other rows.
Return to the TablePress Index
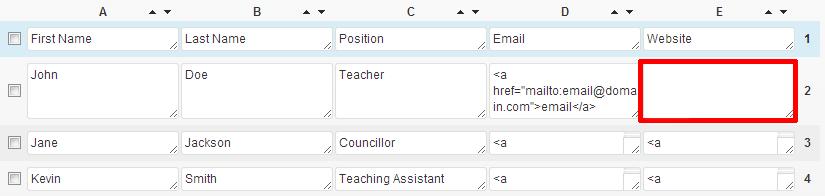
- Click the ‘Insert Link’ button under Table Manipulation
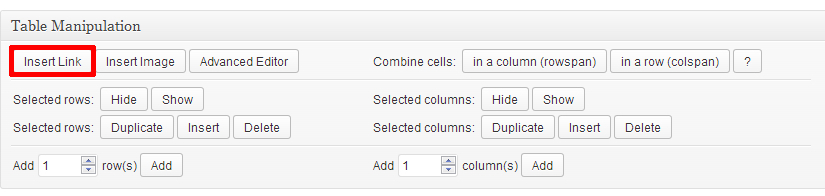
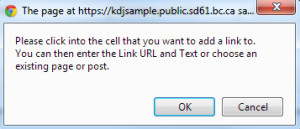
- The popup window contains instructions, read and click Okay
- Click inside the cell where you want the link to be displayed. In this image a link to a website is being added
- In the window that pops up enter the site or file’s URL (eg: http://www.sd61.bc.ca) and the Link Text. This is the text that visitors to your site will click on to view the link.

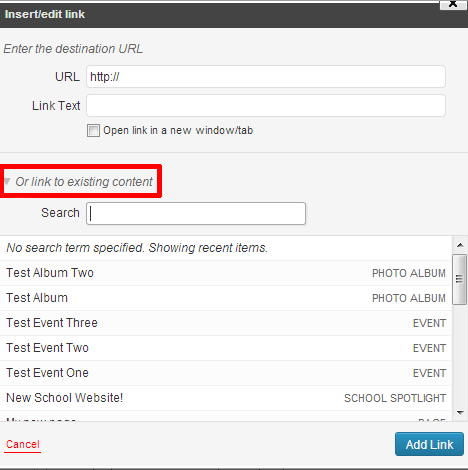
- Alternative to the steps in number 4 you can link to an existing page on your site by clicking “Or link to existing content” and either searching or browsing through the list of pages.
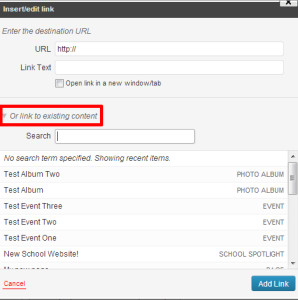
- Click the ‘Add Link’ button shown in the bottom right corner of the image above.


Return to the TablePress Index
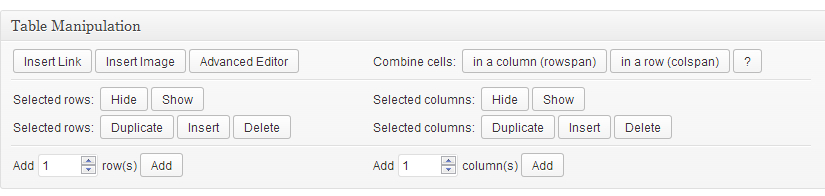
Hiding a row or column is a good way to temporarily prevent content of a table from from displaying on your website. For example, if a staff member takes a leave of absence and you don’t want to display their contact info while they are gone.
- Select the column or row you wish to hide by checking the box located below or beside it.
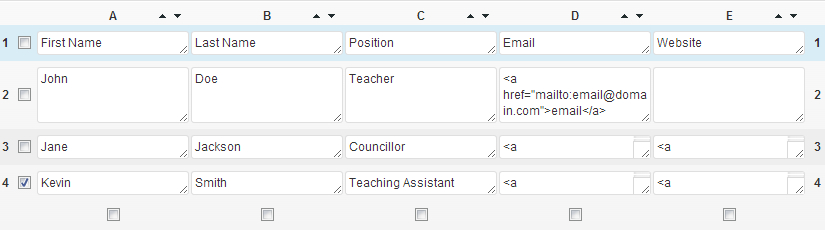
- Click the ‘Hide’ button found under Table Manipulation
- The selected Row is now highlighted in pink, this indicates it is hidden and will no longer appear on your website.
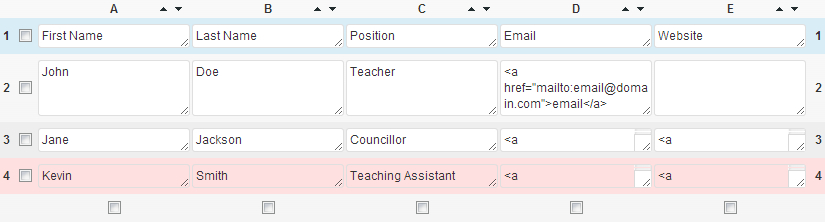
- To show a hidden column or row simply check the box beside or under the column or row and click the ‘Show’ button.

Return to the TablePress Index
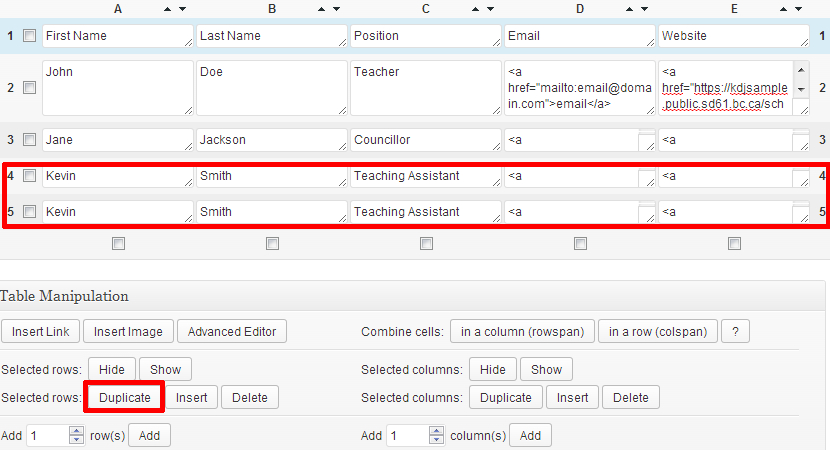
- Select the row or column you wish to duplicate by checking the box located below or beside it.
- Click the ‘Duplicate’ button and a copy of the row or column will appear below or beside the selected row or column.
Return to the TablePress Index
- Select the row or column you wish to duplicate by checking the box located below or beside it.
- Click the ‘Insert’ button and a new, blank row or column will appear above or beside the selected row or column.

Return to the TablePress Index
- Select the row(s) or column(s) you wish to delete by checking the box located below or beside it.
- Click the ‘Delete’ button and the selected row or column will be removed from the table.
Return to the TablePress Index
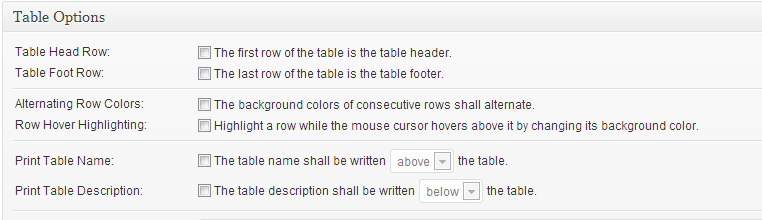
Table Options
Table options allow you to modify the appearance of the table by applying multiple different style options.
Return to the TablePress Index
Checking this box will set the first row in the table as the header.

This applies unique styling to the first row, the top row becomes highlighted and the text becomes bold.

Return to the TablePress Index
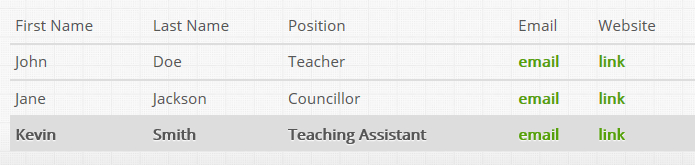
Checking this box will set the last row in the table as the footer.
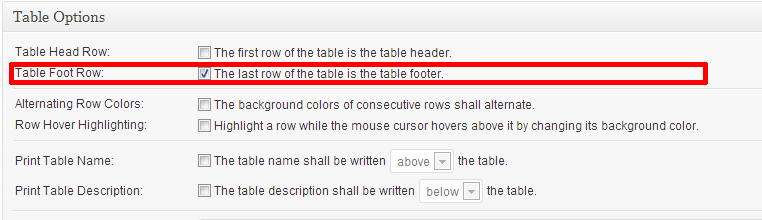
This applies unique styling to the last row, the bottom row becomes highlighted and the text becomes bold.
Return to the TablePress Index
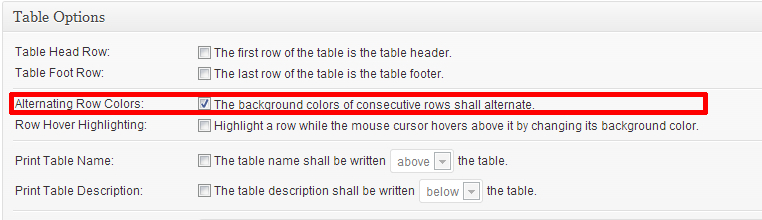
Checking this box causes the table rows to alternate there background color. This can improve readability, especial on large tables.
Return to the TablePress Index
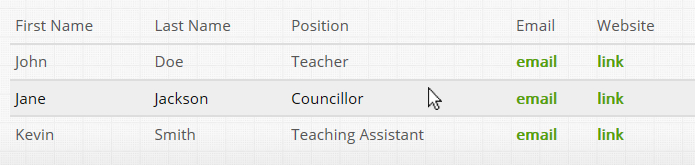
Checking this box will cause a single row to be highlighted when a user hovers there mouse cursor over it.

Return to the TablePress Index
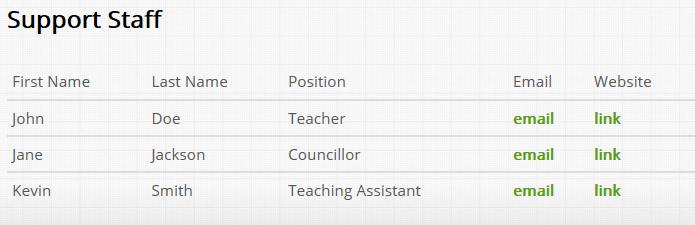
Checking this box will display the table name above or below the table. This is the preferred method for displaying a title on a table.
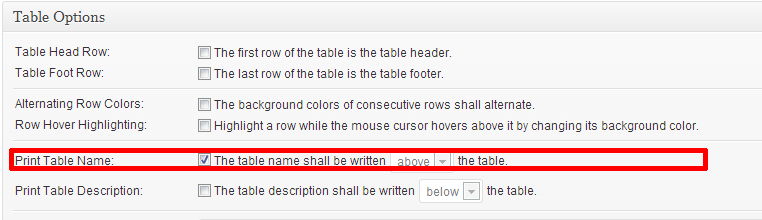
This applies formatting similar to the Heading 3 option in the WYSIWYG editor.
Return to the TablePress Index
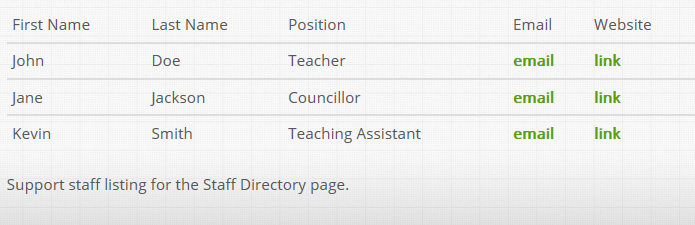
Checking this box will display the content of the tables description either above or below the table in plain text formatting.

This is a good way to ensure important information relating to the table is displayed on any page the table appears on.
Return to the TablePress Index
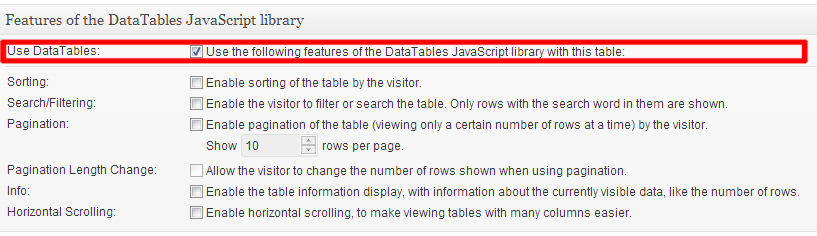
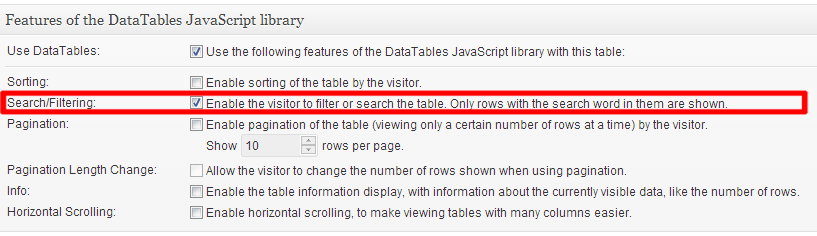
Features Of The DataTables JavaScript Library
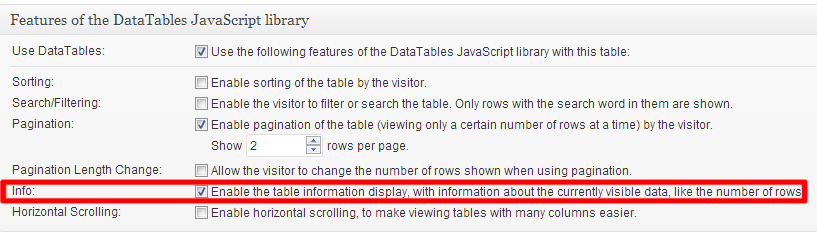
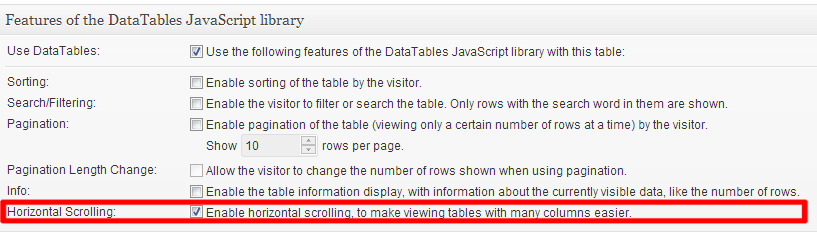
These features and options are only available when the “Table Head Row” check box in the “Table Options” section is checked.
Aside from requiring “Table Head Row” to be checked ensure Use Data Tables is also checked.
Return to the TablePress Index
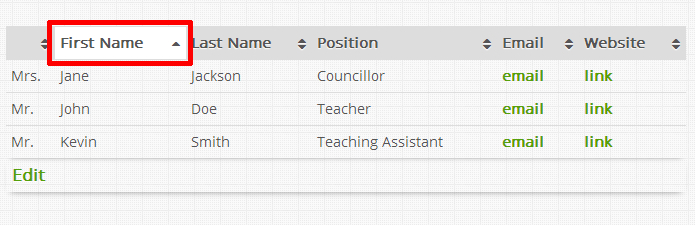
Checking this box will allow the user to sort the table alphabetically by column.
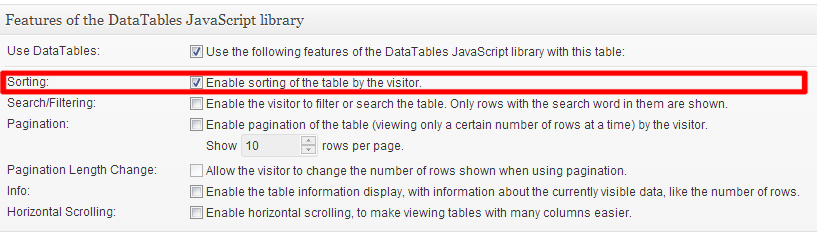
Sorting is accomplished by clicking on the first item in the desired column.
Return to the TablePress Index
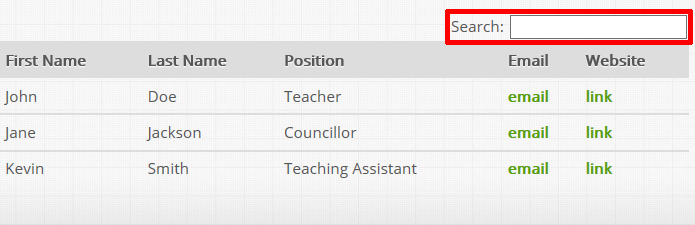
Checking this box provides the user with the ability to search the entire table for keywords, such as some ones last name.
Return to the TablePress Index
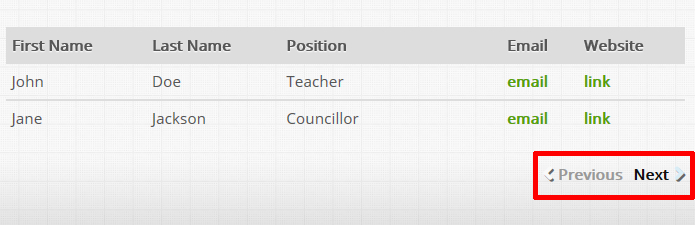
Pagination allows you to set the number of rows the table will display at one time. This is usefully when displaying a table that is to long to fit on the screen.

When a table has pagination enabled, next and previous navigation buttons are added to the bottom of the table.
Return to the TablePress Index
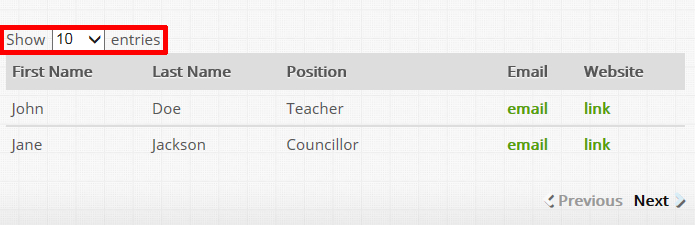
With Pagination on, enabling this option allows the user to decide how many rows will be displayed at one time.

Return to the TablePress Index
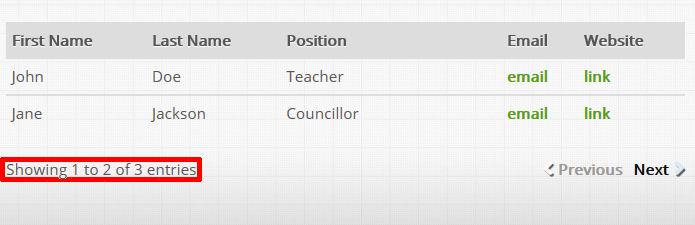
This setting will display information regarding how many of the total rows are currently being displayed. Though not required the Info setting is best used with Pagination enabled.
Return to the TablePress Index
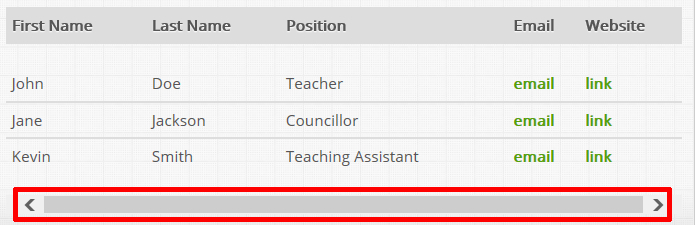
Enabling horizontal scrolling will provide the user with a scroll bar at the bottom of the table, if they are on a low resolution screen, or the table has numerous columns. Horizontal scrolling can help ensure your table is accessible to people with mobile devices.
Return to the TablePress Index
Exporting / Importing Tables
Exporting a table is a useful way to create a backup of your website’s tables, or when adding a lot of data — you can update it in excel and import it back into TablePress.
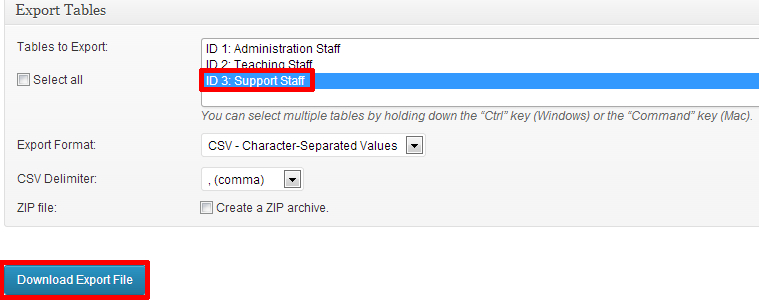
By default the export format is CSV. It is advisable to leave this alone.
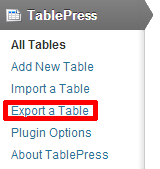
- Click the Export a Table button located under the TablePress drop down on the dashboard.
- Select the table from the list you wish to export then click the Download Export file button.
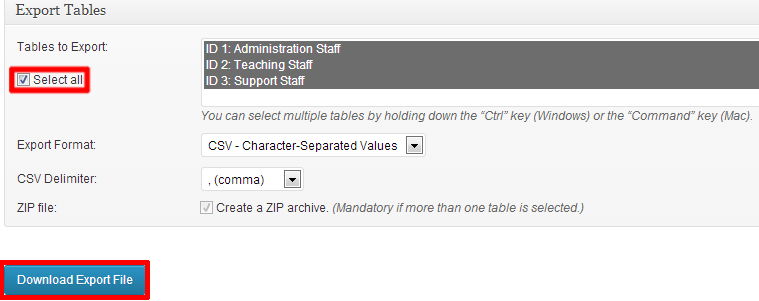
Alternatively you can check the Select all box and download a copy of all the tables in a .zip file
Return to the TablePress Index
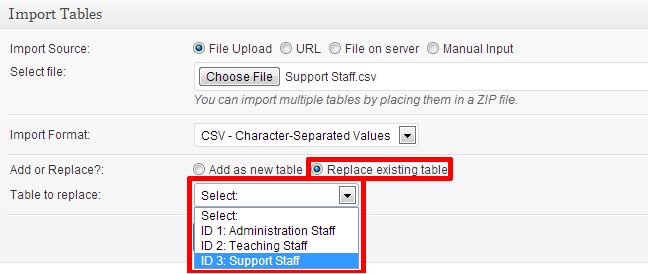
Importing tables can be a quick and easy way to add a new table or update an existing one from a spreadsheet.
By default the import format is CSV. It is advisable to leave this alone.
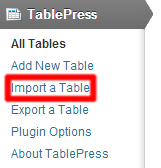
- Click the Import a Table button located under the TablePress drop down on the dashboard.
- Click the Choose File button and select the .CSV file on your local computer. The file type must be CSV, if the file is in another format open it with your preferred spreadsheet program and save a new copy as CSV.
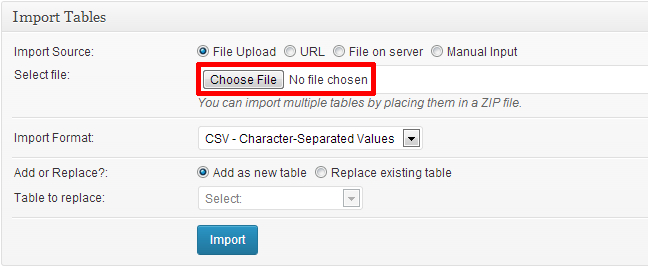
- If you are adding a new table, insure that ‘Add as new table’ is selected and click the ‘Import’ button.

- To replace an existing table select “Replace existing table”, select the table you wish to replace from the drop down menu and click ‘Import’. When replacing a table, all content of the table will be overwritten with the contents of the CSV. If you are trying to update a table, first export it, add the new entries, then import and replace the original.