The Photo Gallery Content Type allows you to create and manage album-style image galleries. (Example 1a)
All created photo galleries are automatically added the the ‘Photo Gallery’ page which is located underneath the ‘Our School’ top-level menu item. This page displays all of the Photo Galleries created in an album style order (Example 1b).
Important: Do not move, modify, or delete the actual Photo Gallery Page. It will not function properly if moved to a different area of the website. If you wish to remove the whole Photo Gallery page, please set it to ‘Draft’.

Example 1a

Example 1b
Adding a New Photo Album
1.) From the Dashboard, choose ‘Add New’ from the ‘Photo Gallery’ menu item in the left sidebar (Example 2).

Example 2
2.) Fill out the following content areas:
- Album Title: This is what the name of your new Album will be (Example 3).
- Album Content: You can use the WYSIWYG text editor to add a description of your album (Example 4). This text will be displayed underneath the Album on it’s page. Please refer to the bottom of Example 1.
- Album Cover: Click ‘Add Image’ to upload/select from the Media Library, an image for the Album’s cover (Ex. 5).
- Album Photos:
-
- Adding photos that have been previously uploaded the the Media Library: Click ‘Add Image’ (Example 6, fig. 1) and select the multiple images you want to include in your Photo Album by clicking on the first photo you want to include, and then shift-clicking the last photo you want to include and finally by clicking ‘Select’ (Example 7). If you wish, you may add Captions to each Photo (Example 6, fig. 2). To add additional photos to the album, click on ‘Add Additional Photo’ (Example 6, fig. 3) and then select the photo(s) from the ‘Media Library’.
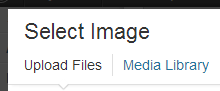
- Uploading photos to your Media Library, and then adding them to your Photo Album: Click ‘Add Image’ (Example 6, fig. 1) and then select ‘Upload Files’ from the overlay that appears (Example 8). Click on ‘Select Files’ and then navigate to the images you want to include in the photo album, select them all, and click ‘Open’. All your selected images will be uploaded to the Media Library, and will be automatically selected. Simply press ‘Select’ to add the newly uploaded images to the photo album. If you wish, you may add Captions to each Photo (Example 6, fig. 2). To add additional photos to the album, click on ‘Add Additional Photo’ (Example 6, fig. 3) and then select the photo(s) from the ‘Media Library’.

Example 3

Example 4

Example 5

Example 6

Example 7
Example 8
3.) Once these fields have been filled, the item is ready to be published. The following steps, available in the ‘Publish’ box, will allow the page to be published, saved as a draft or scheduled for later publication:
-
-
- Save Draft: Click this option will save a revision of the item as a draft. This draft will remain editable and available through the website dashboard, but will not appear on live website. This is useful if a page requires multiple sessions for content creation and editing.
- Status: This allows an item to be saved as a ‘Draft’ or as ‘Pending Review’. Draft status is described above.
- Visibility: There are three levels of visibility available to published items: Public (visible to all website visitors), Password protected (available to all website visitors who know a password), Private (available only to website visitors logged in to the website.)
- Publish: This allows the editor to publish the item immediately, or schedule publication of the item for a later time/date. If set to publish immediately, the item will appear on the live website as soon as the ‘Publish’ button is pressed.
- Move to Trash: This allows an item (draft, scheduled, or published) to be moved to the dashboard trash. It will be removed from the live website, but will remain available to users logged into the website dashboard until the trash is emptied.
-

Example 9
Adding an Album to a Page
If you wish to add a photo album to a specific page, there are a number of ways in which you can do so, and it is up to you about how you decide to do this. The following two examples are the most optimal way of linking to a Photo Album from a Page:
Example 1:
-
-
- Add the cover image from an album to a page, and resize it to 150px by 150px (click on the image and then click on the image options icon (Example 10).
- Select ‘Advanced Settings’ and enter the desired size in the ‘Width’ and ‘Height’ text fields.)
- Give it a caption, you could use the title of the photo album.
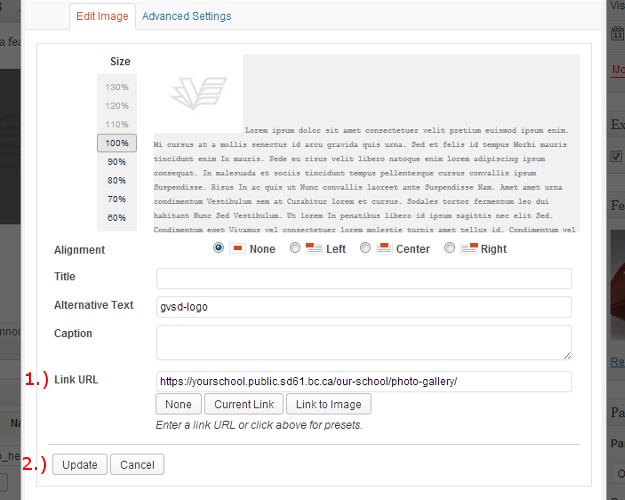
- Link that image to the specific photo album page. To link from an image to a page, click on the image, then select the image options icon (Ex. 10) then enter the target URL into the ‘Link URL’ text field (Example 11, fig. 1). To confirm the change, simply click on ‘Update’. (Example 11, fig. 2).
-
Example 2:
-
-
- Use a simple text link from inside a page to the specific Photo Album. To learn more about creating links on a page, please refer to this section of the guide.
-
Example 10
Example 11